Paul’s British Attackers(?) defeated Bill’s Germans
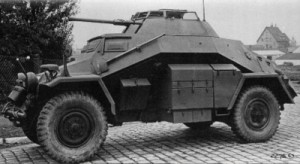
PSW222
This is an interesting scenario that starts the players right in the middle of the action. The British player has two roads to victory – either exiting 9 VP of non-crew personnel off either the south edge of the map, or off a pier to the north. They are prevented from immediately doing this by the German units can can (likely must) getting some of their units on both the north side of the Brits, in a small cluster of buildings I’ll call the “North Village” and in a couple of rowhouses near an intersection to the south. This is the reason I have a question about calling the British the Attacker in this, because both the Germans and the British have to do a great deal of both attacking and defending in this swirling mess. The British player also has at the start three small tanks with a 15mm cannon worth 6 IFE as well as a 4FP CMG. These can be fearsome in OVR and CC vs infantry, but are largely useless if you are trying to kill the German PSW 222, both of which must start in the North Village.
My original thought was that exiting my troops off the south edge was the best way to go, but like most plans, it did not survive contact with the enemy.
The skirmishing forces of the Germans to the north started putting pressure on my troops as I was starting to ease some squads southward, and I decided that since I had a decent number of concealed troops, I would try to hold the line and force Bill into entering CC with me, hopefully to be Ambushed and killed. On one hand, this was a successful idea – one close combat phase (I think it was his turn 2, actually) Bill advanced into CC in four different hexes, one of which was against one of my tanks. He successfully ambushed me in one hex, and I got no ambush at all. Results: One of my HS killed, one Squad CR’ed, no effect vs tank, no effect vs other squad.
The next turn, the tank in the melee drove off and was promptly blown up with a MMG fired right up the tailpipe. During my turn, I was able to reinforce two of the CC and won both, which suddenly opened up the exit off the pier as the best alternative. It became a matter of preserving the force I had (10 exit VP, so I could afford to lose ONE HS, but no more) and get them in position to exit. Bill’s Armored Cars still held the road to the pier, but only one one squad of Germans was in the way.
I worked my tanks around to harass and annoy his ACs and remaining squad. One turn, I overran one of his Armored Cars twice (19+2 attack), but I either rolled horribly on the result DR or a result was shrugged off when he made his morale check. I ended up overrunning that one AC FOUR TIMES and still didn’t kill it. It ended up succumbing to the tender mercies of my A13 Mk II tank with the 40L gun. Another of his AC’s disabled his MA and fled off the map. Two of my starting three tanks and both of his PSW’s malf’ed their MA early in the game. I never tried to repair mine, to prevent Recall.
Bill worked hard to bring his forces north to cover the pier from a cluster of buildings to the southwest of the pier. He got them (mostly) into position on his last movement phase, so I had to figure out how to prevent them from firing at the units exiting the pier. I chose to drive a couple of tanks into bypass with these units – both tanks had to roll for ESB, one for 3 MP, but they got there. One of the tanks got blown up with an ATR shot, but the crew survived and fell into the building with the Germans, again preventing them from shooting out of the hex. Once those units were in place, I was able to run my units across the pier and out to take the game.
It was a tense game the whole time, with the fortunes of war crapping on both of us in turn.